In the previous part of this article, I’ve shown you where to download the required packages for use with the upcoming laboratory. In this part I will guide you through the very basic VMware ESXi installation on VMware Workstation. For this you will need the VMware Workstation installed on your system, along with the Hypervisor ISO. Without further ado, let’s begin.
Creating an ESXi Virtual Machine
Inside the VMware Workstation, select File -> New Virtual Machine, or just press CTRL+N. This will bring you to a New Virtual Machine Wizard
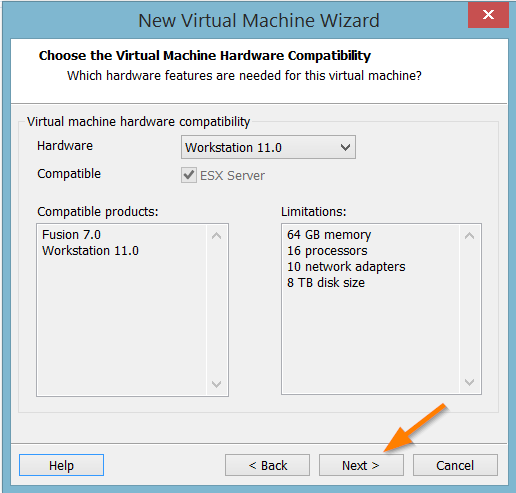
 In the wizard we have a choice to either go through the “faster”, Typical configuration, or via the extended, Custom configuration. Let’s take a look at the latter.

The first question you’ll be asked is to choose the hardware compatibility. This means the level of features that will be available for your Virtual Machine. As you can see with Hardware Version 11, the limitations aren’t… limitations, really. You could make a VM with up to 64 GB of memory, 16 processors, 10 virtual NICs and up to 8 TB VMDK. The hardware version also denotes the version of VMware Workstation (or Fusion/Workstation) will be able to run the VM in case it would be transferred elsewhere. The ESX server compatibility field is frozen – if you would straight up copy the whole VM’s folder, you could run it in ESXi with some minor modifications.
 In the next widow we’re required to choose the ISO of our choice, in this case it will be the ESXi hypervisor, named VMware-VMvisor-Installer-6.0.0-2494585.x86_64.iso – this is the image of General Availability (GA) version of ESXi 6.0. Hit Browse and select the ISO…
 The OS detection is intelligent in that it will tell you what OS you are going to install… or at least tries to. Since VMware Workstation 11’s list hasn’t been updated since ESXi 6.0 came out, it predicts that it is just a mere beta. Do not be fooled though, this is the real thing!
 After the ISO was selected, we’ll go forward to give our VM a name. Since I am a huge fan of System Shock series, we’ll name our first ESXi hypervisor SHODAN… and wipe a nostalgic tear or two 🙂
Next we’ll be asked for a CPU count. Since I have 4 physical CPU cores in total and I don’t want the two eventual virtual ESXi hosts to contend for resources and hog my CPU, I’ll choose two processors with 1 core per processor.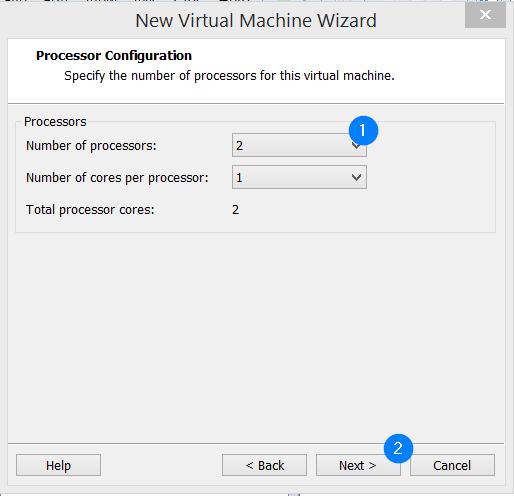
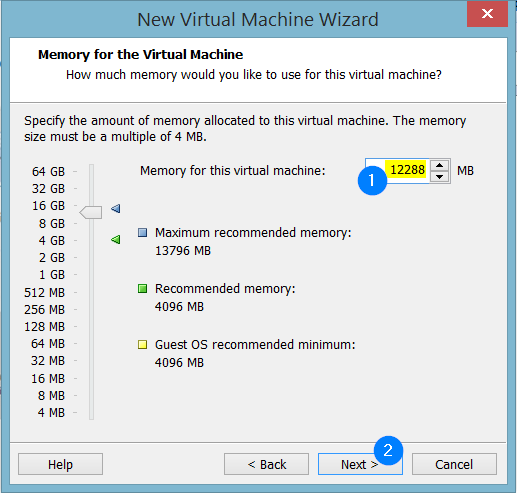
I will configure the RAM for the first initial deployment of the ESXi host. I will need about 512MB of RAM for Windows Server Core Domain Controller, initial 8GB RAM for the vCenter Server (either the Windows-based version, or vCenter Server Appliance) and about another 2 GB of RAM for the Windows Server GUI edition that will have VMware Update Manager installed – depends if I decide to have it standalone or not. Either way the VMs will eventually be reconfigured to squeeze into 6GB RAM so I can build a second host.
 The networking choice is straightforward – we’ll use NAT virtual NIC by default – but that won’t be the only NIC present for our VM. We will add the additional ones later.

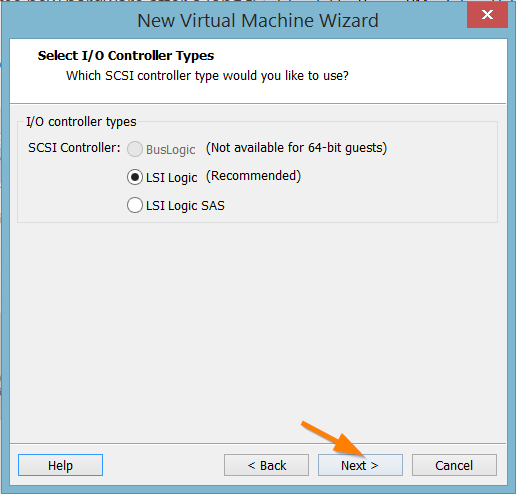
Next up is the SCSI controller settings, which we’ll leave at default. The performance between the two available types would be negligible. We will need this controller to only read from the disk, because ESXi is loaded into memory on startup and stays resident.
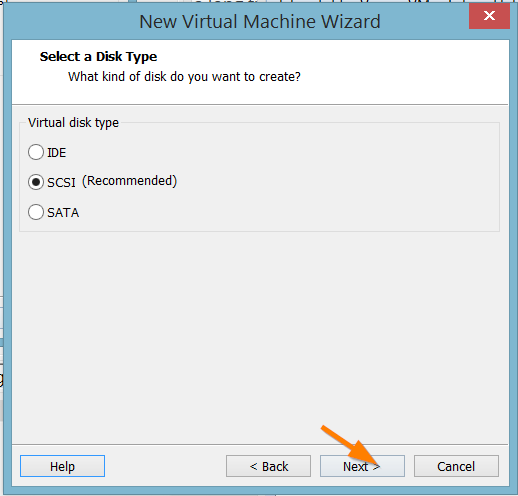
The same is with disk type – since ESXi is supposed to be running on servers, SCSI is the best choice. But yes, it can also run on white boxes with SATA connections, but I am not so sure that it would be compatible with IDE in this point of time.
We need to create a new virtual disk for this machine, so we will do just that. We could dedicate the whole physical RAID0 array that I’ve created in the previous part, but I have quite different plans with that disk space.

4 gigabytes are more than enough for the ESXi files. Only the hypervisor itself will reside there – plus a second bootbank when an upgrade is done or a new package/patch is installed – but combined, that wouldn’t cross 1GB. We can also use this local storage to store logs. We don’t want to allocate disk space right now – that way we will enable thin provisioning that writes data on demand and saves disk space. We will also store the disk as a single file because we don’t want to clutter our hard drives. Of course if you are still running on FAT32 partition and want to create a virtual disk larger than 2 GB, you should use this option.
Eventually we are asked to name the virtual disk file that has just been created. It can be named anything really, but the names are best aligned with their parent VM’s name.
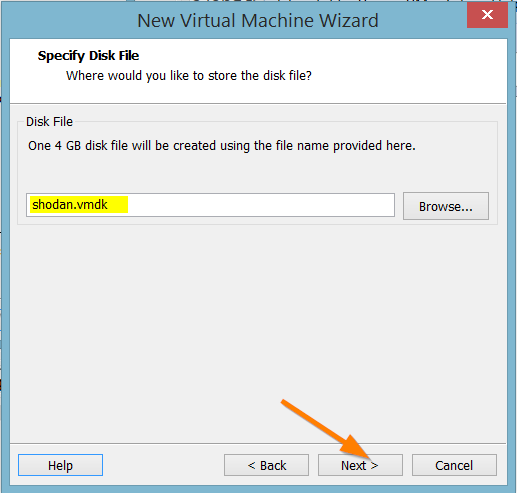
We can review the VM configuration we have chosen, and if you change your mind, you can use the Customize Hardware button. We are happy with all the settings made, so I’ll just click on Finish.
And behold, below we see our new Virtual Machine’s tab with all the general info included. Now, if the Power on this virtual machine after creation was checked, you’ll get to the boot menu mentioned in another section below, but first let’s talk a little bit about what we’ve done.
Creating a VM – What was done?
With the help of configuration wizard, we have successfully created a Virtual Machine in the VMWare Workstation Type-2 Hypervisor which allows us to virtualize virtual guests in the form of a process . This hypervisor runs on top of a “Master” OS – mainly Windows and Linux.
The whole virtual machine is a set of files and each file has its own, very distinct function. These files are:
- .vmx – Virtual Machine Configuration – this file has all the required configuration data present. Things like amount of RAM, number of CPUs, attached devices and more are present in this file. It is a plaintext file and can be “hacked” around if need be, but for now we’ll leave it in peace.
- .nvram – Virtual Machine BIOS – Every virtual Machine has its own BIOS, and its settings are saved in this file. This file is not human-readable and can’t be modified outside VMware ‘s BIOS environment.
- .vmdk – Virtual Machine Disk File – all data on a single virtual disk is stored there on a Virtual Machine File System (VMFS) – a file system that is tailored for virtual machines.
- .vmsd – Virtual Snapshot Metadata – is used as a descriptor file pointing to another virtual disk after a snapshot was taken so the hypervisor knows which is the base disk (that became read-only) and a member (delta) disk that the deltas from the base disk are written to.
- .log – Log File. Debug information is written into the log file at run-time. Useful to know when you want to take a look at what is running under the hood and for troubleshooting purposes.
- .vmxf – Team Member – is a descriptor file for VMware Workstation. A human-readable XML.
The files can be viewed on the screenshot below:
If there was one or more term you didn’t yet understand, do not worry. These will be looked into in a greater detail later in the series. For now, congratulations on creating your first virtual machine in VMware Workstation. And not just any virtual machine, you’ll be literally running VMware on VMware!
Booting the ESXi Virtual Machine
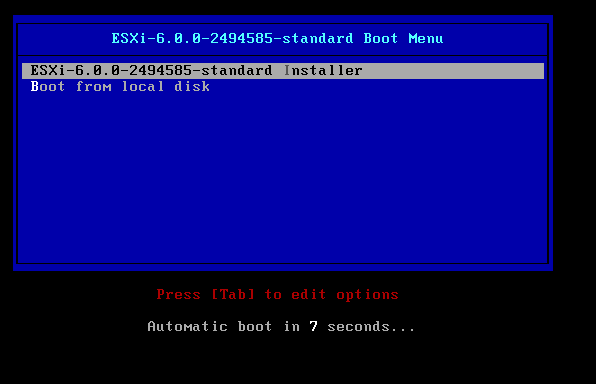
Now, after the boot from ISO is successful, you will be taken to a Boot Menu that shows us the ESXi version and a build number. Since we will be doing a very basic installation, press Enter.
Modules will start to be loaded into the memory and an installer will start…
You will be shortly taken into the staple grey-orange screen that symbolizes VMware’s Hypervisor. All modules required for installation are being loaded into the memory.
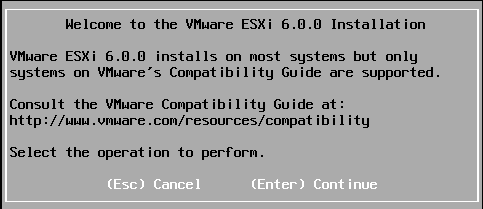
After a short time, you will be welcomed to the installation. You are notified that the ESXi installs on most systems but you will only get support from VMware if these check the Hardware Compatibility List. And this is indeed true, ESXi runs on a wide variety of recent hardware, however the older types of hardware are deprecated with every release, so it’s good to keep up.
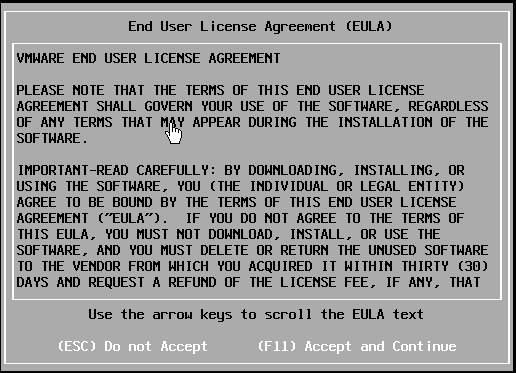
After pressing Enter you are invited to read the EULA, and after you are finished reading, press F11 to accept the terms and continue with installation.
Storage will be scanned…
And you will then be invited to install the hypervisor on your 4 GB partition you’ve made earlier.
After you select a drive where to install the hypervisor to, you will select a keyboard layout. The ESXi has plenty of keyboards to go by.
Next up, you will have to fill out the root password. It will have to be a strong password by defalt, requiring an uppercase, lowercase, numeric and a symbol letter with a minimum length of 8 characters. Think of something crafty and you are ready to install the hypervisor.
You are asked to confirm that you want to install the ESXi on the chosen disk drive. You will begin installation with F11.
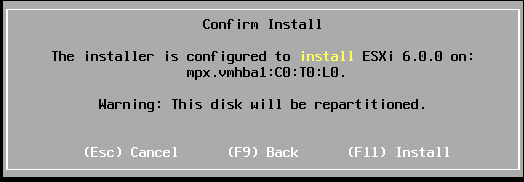
And here it goes! The installation is fairly quick, so wait a minute or two…
And eventually you will be notified about a successful installation and the 60-day evaluation period in which you can freely use all of ESXi’s features. Reboot by pressing the Enter key.
After a fairly short boot, you will be taken to the “basic” screen where you will see the ESXi’s version and build number, your CPU’s Model and core count, as well with an IP address that has been assigned address by the VMware Workstation’s DHCP server.
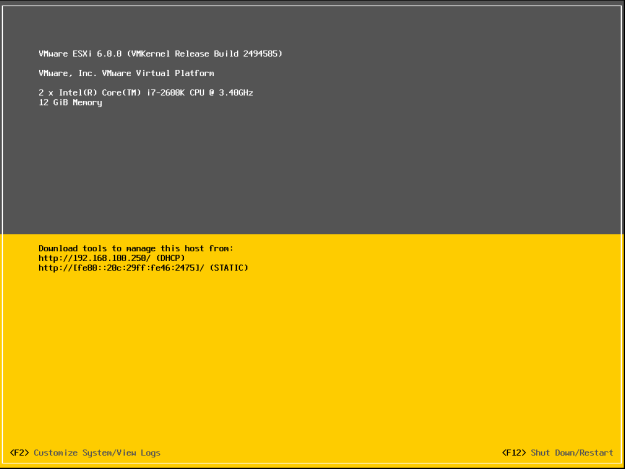 There we go! The installation was surprisingly easy and straightforward, wasn’t it? A few presses of Enter buttons, pressing F11 to accept the EULA, and the hypervisor is alive! One more thing we will do is configuring a management network, through which we will be connecting via the vSphere Thick Client to deploy our very first VM – a Domain Controller based on Windows 2012 R2 Core Edition.
You can either press F2 to enter the Direct Console User Interface (DCUI) or F12 to shut down or reboot the ESXi host. After pressing any of these two keys, you will be taken to an authentication dialog. Enter the root password you have defined before and confirm it.
 Welcome to the DCUI! You’ll be navigating via cursor keys. Select “Configure Management Network” and press Enter.
There, select IPv4 Configuration, navigate to an option with a bullet you want to use – we want to set a static IPv4 address – and select it with SPACE key. Set your desired IP address via which the ESXi host will be managed. I will choose a convenient 192.168.100.100 for the first host. Confirm the settings by Enter key.
You will then be back in the Configure Management Network screen. Press ESCAPE to go back to the main menu – you will be asked to apply the changes.
Just press Yes and that’s it! Your ESXi host now has a static IP address, to which you can connect via your internet browser. To initially configure the ESXi host further, you will need the “Thick” (or C#) vSphere client. You can get the most recent version compatible with your currently installed ESXi by just connecting to the address you just assigned via any web browser! The screen will look like this
 Just click on Download vSphere Client for Windows (the most recent version of the Thick client is VMware-viclient-all-6.0.0.exe. I assume you are expert at installing applications already, so after a short press-next-to-win process and launching the vSphere Client, you will be taken to the login screen. Enter your ESXi host’s set up IP address and login with the root account. Just a small note, I am using a 1440p monitor and the application does not scale that well but it will be enough for our short sessions.
Since vSphere does a check for a valid, trusted-authority certificates, you will be asked to install the certificate to your client machine. Just click on Ignore to login
After logging in, you will be notified that you are running in an evaluation mode. If you have kept your ESXi hypervisor key that you have acquired after registering for a 60-day trial, you will have a use for that later. After you have pressed OK, you have now a full access and control of your fresh ESXi host. Feel free to click around and explore! Soon we will be doing plenty of operations in this GUI.
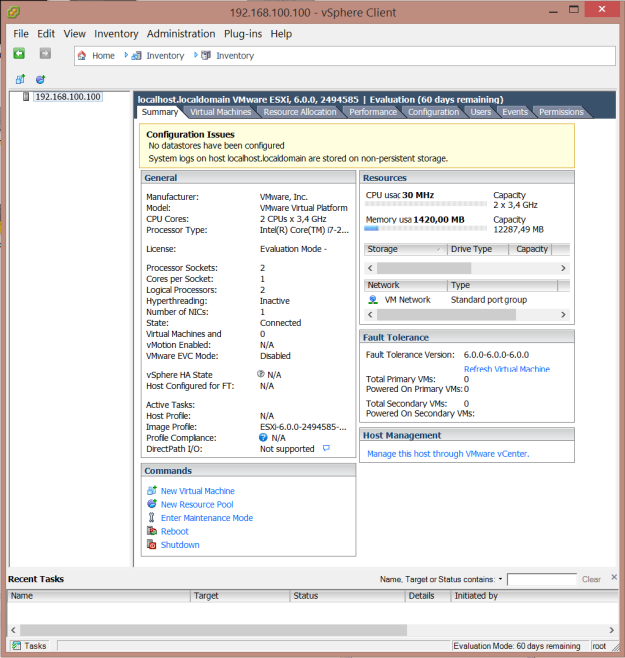 Congratulations! We’ve done a lot of work in this lab part. After creating a Virtual Machine, we have successfully booted it, loaded an installation ISO, changed the management IP after installation and then logged in to the host to have the ability to explore what all lies there to explore.
Booting the ESXi Virtual Machine – What was done?
After creating a blank Virtual Machine pre-configured for the automatically determined Guest OS, an ISO was automatically mounted to it. The ISO was booted and the OS installed which was a pretty straightforward fashion. In the DCUI Console, we’ve modified the management network to something more “recognizable”, and connected to our ESXi host with the VMware vSphere Thick/C# Client.
Next up, we will need to configure a Shared Storage, that will be done with the help of StarWind Virtual SAN Version 8, and after that is done, we’ll be deploying a Domain Controller which is a requirement for the vCenter to work.
If you’ve made it all the way through the article, I’d like to thank you very much for your attention. Cheers!
