Hello and a hearty welcome to my series on making a virtualization lab! In this first part of lab preparation I’ll show you where to get the needed binaries, set up networking in VMware Workstation and create a software RAID0 out of 3 SATA HDDs. I have been wanting to do this for quite some time – and finally, there is no time better than the present. This is because the Lab can be run using the cutting-edge software that was provided to me in the form of vExpert Licenses.
On the hardware side – because I am constrained by budget for this vSphere lab (which equals zero at the moment), I have decided to make use of the most I have available. This means I will be utilizing my Whitebox’s hardware with VMware Workstation 11, and creating a basic lab from the resources I have at my disposal.
Lab Specifications
At first we’ll take a look on what I have available – only the compute resources used for virtualization will be noted below:
CPU – Intel Core i7-2600k @ 4.05 GHz – 4 Cores, 8 Threads.
RAM – 16 GB 1866MHz DDR3 Memory
Storage – A software RAID0 out of three SATA drives and perhaps a small 60GB LUN from my 120GB SSD – this will be provided by StarWind Virtual SAN software iSCSI Solution which I got a NFR license for (again, thank you vExpert Programme!).
This hardware configuration will enable me to run two ESXi hosts each with 2 CPUs and 6GB RAM. As far as the software goes, I will be using Windows Server 2012 R2 – both Core (for Domain Controller) and the “GUI” (or non-Core edition) to serve as a management console for both of these previous servers.
Preparing the Lab – Installation Images
In order to prepare the lab, I will need several things. First up are our bits – the installation images for OS itself, VMware Workstation, ESXi & vCenter Server.
- Getting Windows Server 2012 R2 Evaluation Image– You can get a 180-day Windows Server 2012 R2 Evaluation Image from TechNet – you will need a Microsoft Account in order to apply for and download it. I recommend getting the .iso file.
- Getting VMware Workstation 11 – You can get a 30-day VMware Workstation Trial on its Evaluation Portal. You will need a free My VMware account in order to be able to download the bits.
- Getting vSphere 6 & ESXi 6– Since VMware has recently released the vSphere 6 bundle, you can get the installation images both for vCenter Server 6 and ESXi 6 on its Product Page’s Evaluation Center. Again, you will need a free My VMware account.
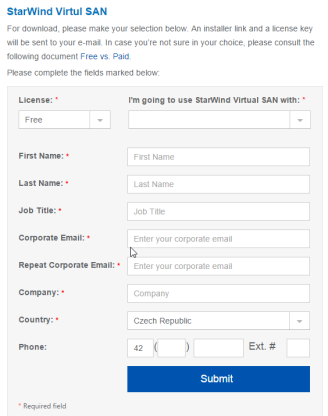
- Getting StarWind Virtual SAN – You will need to complete a short registration in order to get your own license file for a free version of StarWind Virtual SAN that will be providing the shared storage backbone for our ESXi hosts.
Downloading the Required Bits
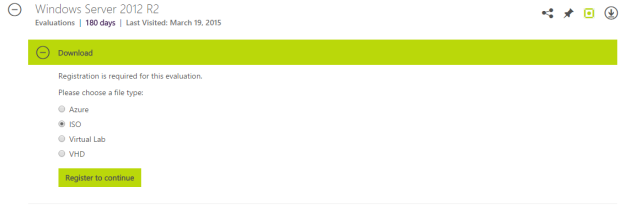
After visiting the Windows 2012 R2 TechNet Evaluation Portal, you will be asked to Register before you are able to download the ISO file:
What you’ll need will be just your Name, E-mail Address and Job Function in order to download the .iso. After clicking on Continue on the next screen, the 4,5GB Image will start downloading.
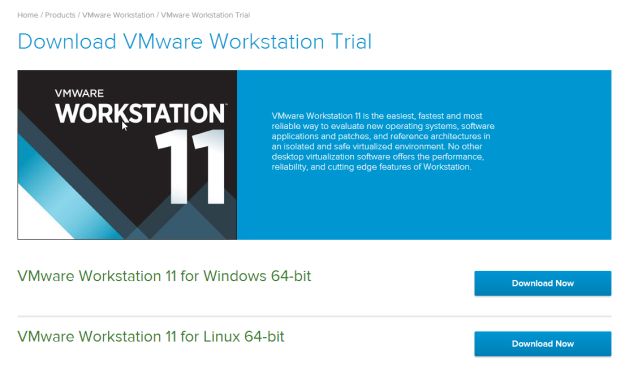
Downloading VMware Workstation is just as easy as clicking a link and choosing a flavor that suits your OS you are currently running:
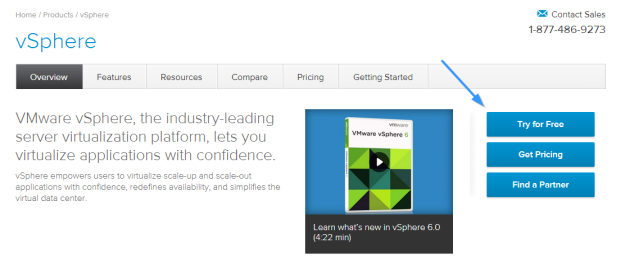
You will just have to press “Try For Free” button on the vSphere 6 Product Portal in order to request access for a 60-day trial,
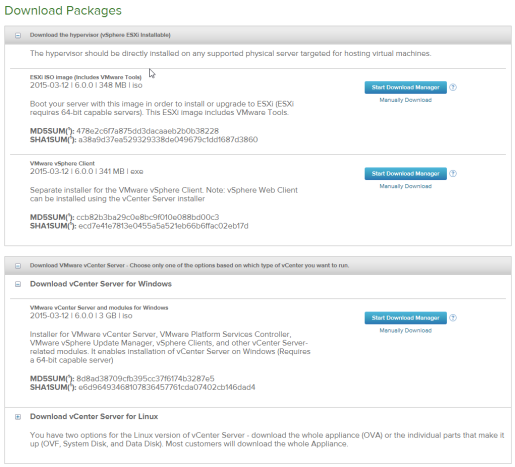
Getting vSphere 6 Components requires you to have a My VMware Account in order to access the download links. After the registration is completed & you are verified, you will be able to get all the components of the vSphere 6 Bundle: The ESXi Server, vSphere “Thick” client in order to connect to an ESXi host directly, and a vCenter Server flavor – either for Windows or Linux Appliance – vCenter Server Appliance, abbreviated as VCSA.
You should download all three and you are good to go.
Last in our installation bundles is the Starwind Virtual SAN software – just register for a Free version and you will shortly receive an e-mail with the software download location and your license key.
After you are done, you’re just a few steps away from getting your own virtual lab running in order to play around & experiment with!
Getting the Environment Ready – Network
I’m assuming you are an adept at installing new software. Basically all the installations are just click-next-to-succeed. We will need to first install the VMware Workstation. It is a Type-2 Hypervisor that runs on a physical Hardware’s Guest OS such a s Linux or Windows. This is ideal for us since we do not have two white boxes lying around, nor the budget to build them – even if we’d really want o get our hands on some new hardware after a long time.
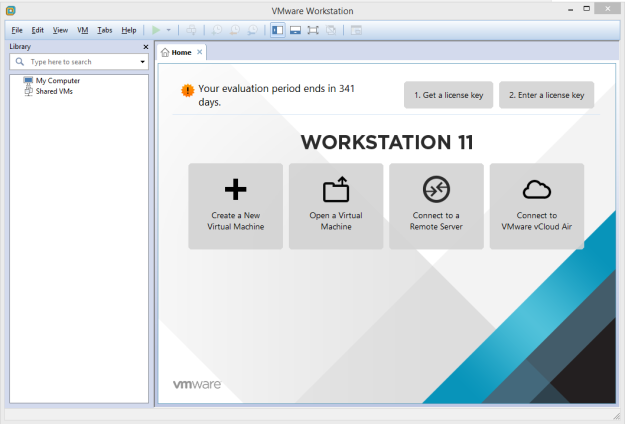
After installation of VMware Workstation, we’ll be greeted with the initial screen:
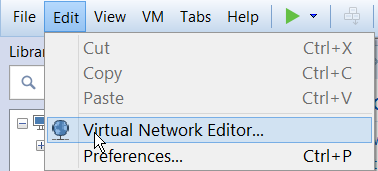
The first thing we want to do is to look up on the network settings. We’ll be using two networks. 192.168.100.0/24 for NAT that’ll allow our Virtual Machines to connect to the internet in this scope, and 192.168.101.0/24 for a host-only networking that will be used for Storage, vMotion & Fault Tolerance Kernels. From the VMware Workstation’s window, select Edit -> Virtual Network Editor (Sorry, no keyboard shortcut there)
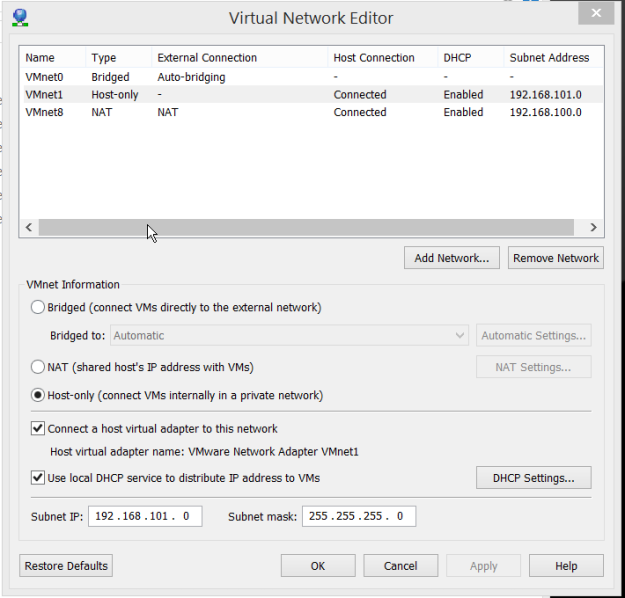
From there, we’ll get to two pre-set networks that were created automatically during the application setup.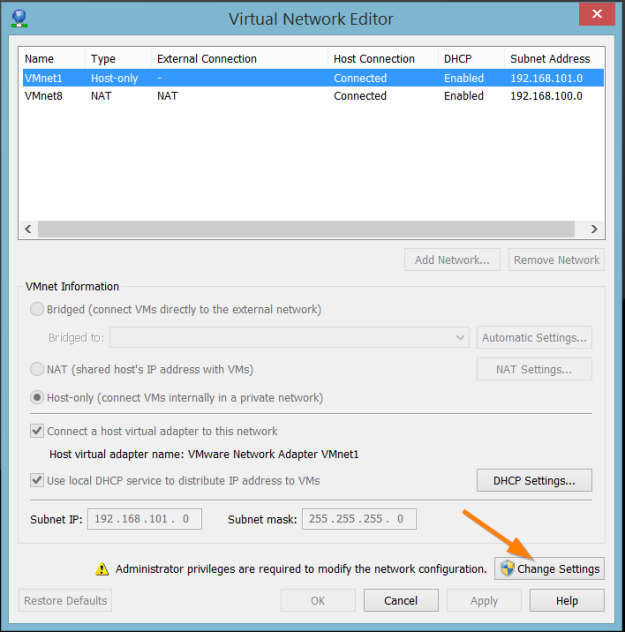
To dabble in the settings, you will need to press the Change Settings button. You will receive an UAC notification if you have turned it on. And with that, you’ll get to the extended settings menu:
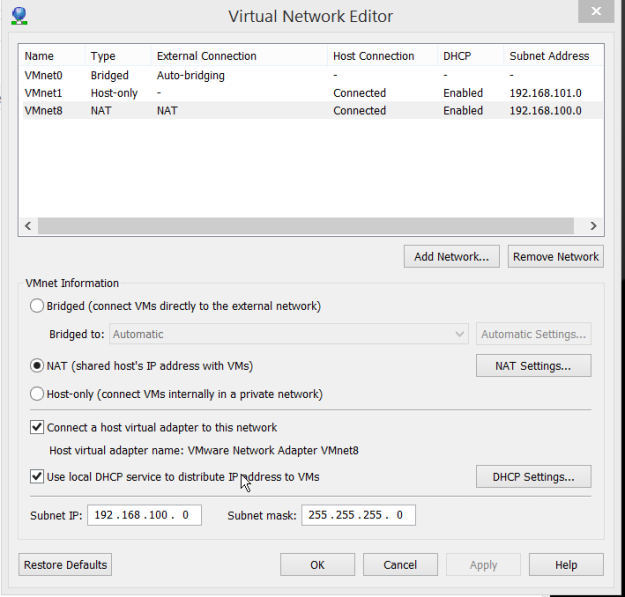 I’ve selected the NAT network by default and modified my IP ranges to be 192.168.100.0/24 from which I’ll be assigning the IPs to my VMs. My local machine has an IP of 192.168.100.1. The rest was left at default. We can also inspect how NAT is handled in NAT Settings menu:
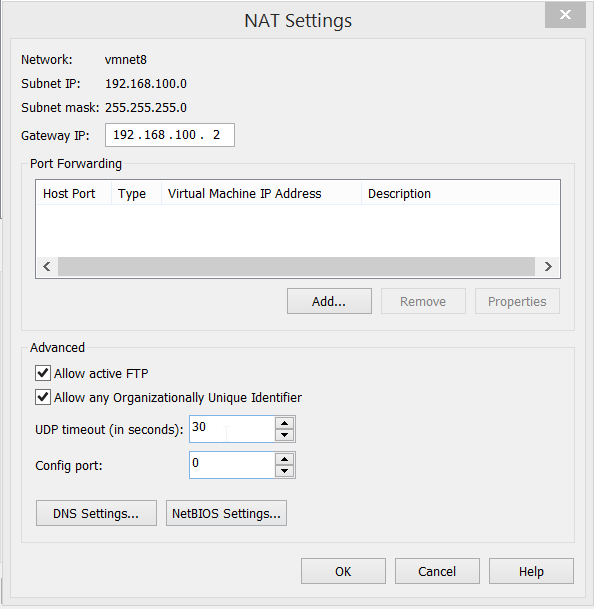 Here we see that the default VMware Workstation’s gateway for this IP range will be 192.168.100.2 – this will be used on all adapters that need to access the other machines and the internet via this gateway. We can also take a look at port forwarding when you select the Add… button:
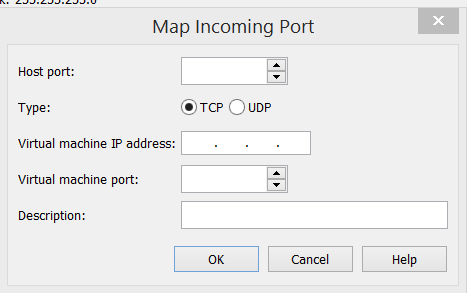 This would allow you remote connections to your VMs – the hosting physical machine’s port would be mapped to a VM IP address and its pot, with a handy description. Next up are the DNS settings:
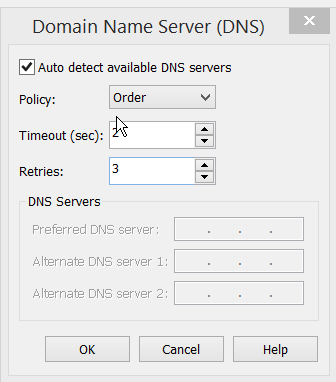 These are pretty self-explanatory. The DNS for this virtual network can be set up on demand, by default these are retrieved to be the ones that are available to your physical host, but can also be re-routed to Google’s DNS servers for example (4.4.4.4 and 8.8.8.8). The last item on the main menu is DHCP Settings:
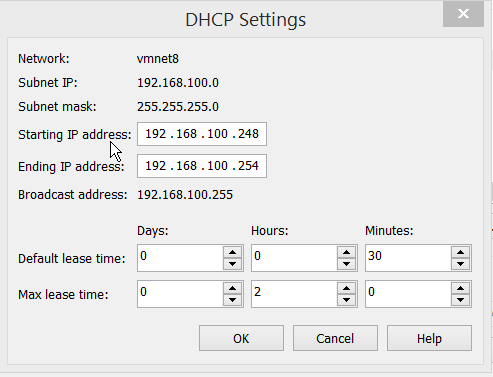 There you can set up the starting and ending IP address of your DHCP range, and the lease times for your IP addresses. For completeness’ sake, I’m adding the Host-Only network configuration below:
As you can see we will be having a private network in 192.168.101.0/24 range. Next up I’ll show you the creation of a software RAID0 array from 3 of my SATA drives in Windows 8.1 host system.
Getting the Environment Ready – Software RAID0
To be able to run at least two virtual machines on the same hard drive, the 7200RPM IOPs won’t suffice, so I have chosen to create a software RAID0 from 3 SATA drives, which should handle a few non-IO intensive VMs running at once.
From the disk management console invoked by diskmgmt.msc, Right-click on the free space of a disk drive on one of my 3 drives, and chosen “New Striped Volume…”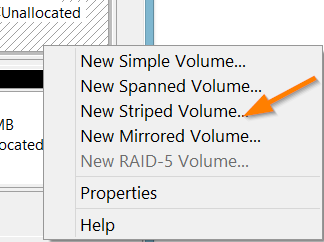 This will get us to a wizard:
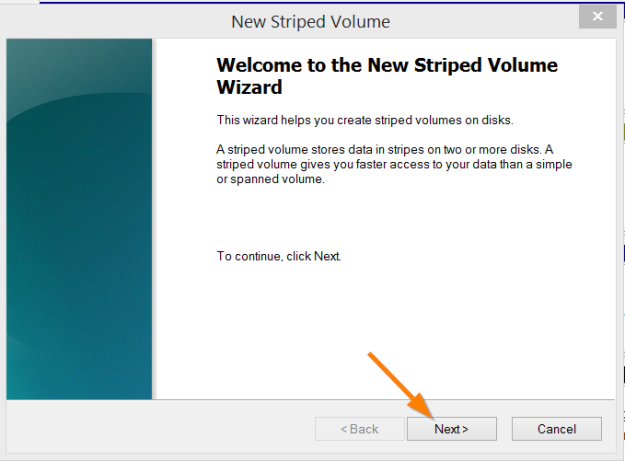 Classic Click Next screen…
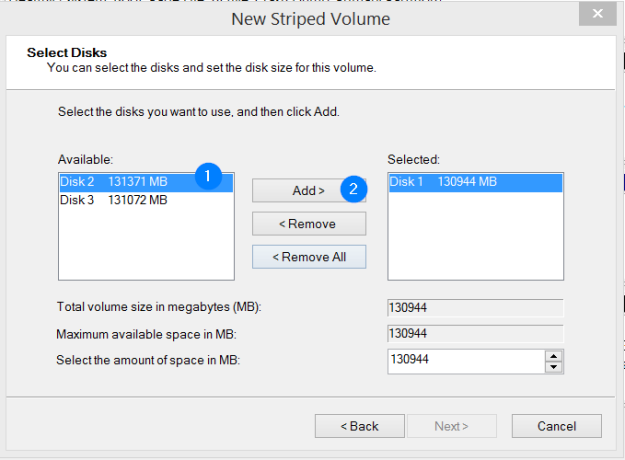 The disk that was selected was automatically moved to the Selected column. Now we need to add the remaining disks (or rather their partitions) to the pool. It can be done either by clicking on the disk in Available column and Add button, or can be done by simply double-clicking the chosen disk. After at least two drives will be available, the Next button will light up.
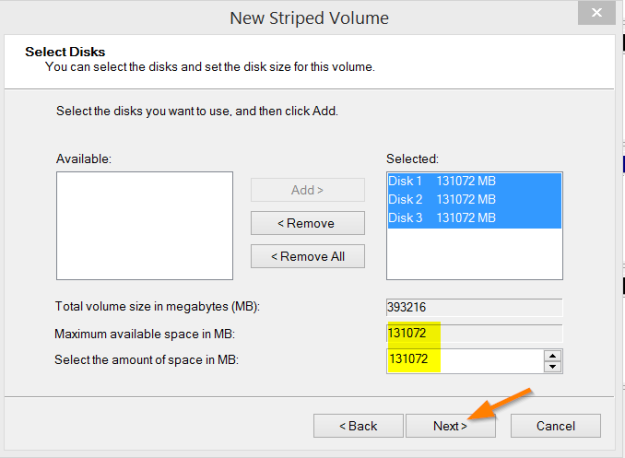 Make sure that “Select the amount of space in MB” writable field equals Maximum available space. You can not proceed otherwise.
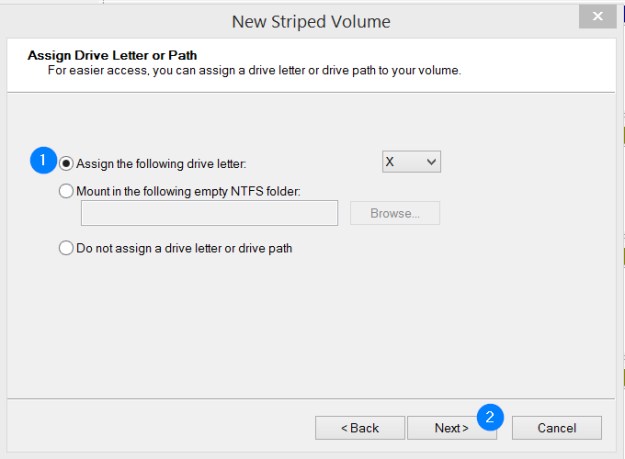 Next you can choose what to do with the newly created partition. Either assign a drive letter, or mount it to an NTFS folder. I’ve chosen the X: letter.
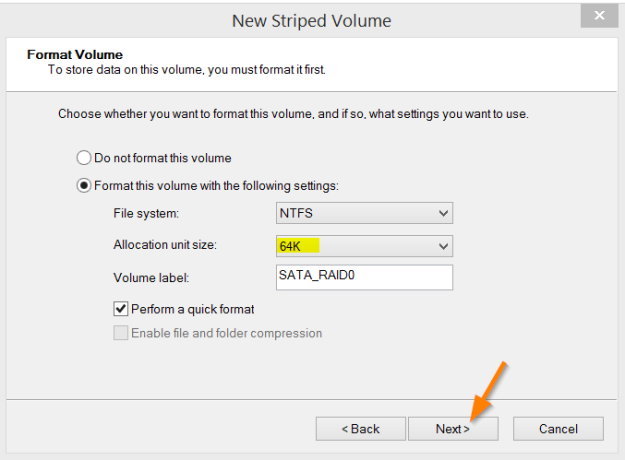 On next screen I’ve chosen to format the volume with NTFS and 64k block size. This is because the .VMDK files are large, and the provisioned iSCSI LUNs via StarWind Virtual San will be ~512MB Chunks of data.
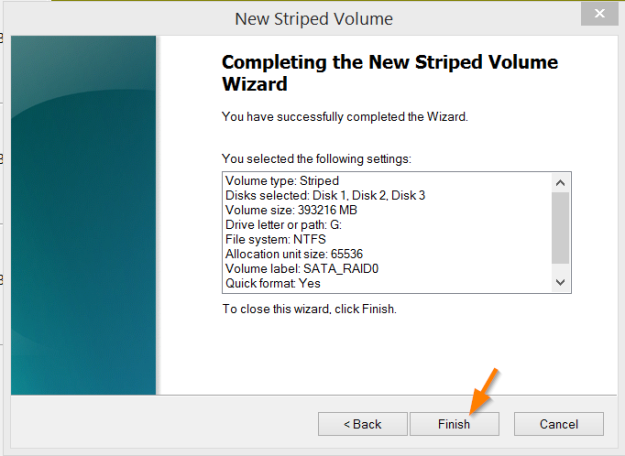 Next up is the review of information and we’re ready to finish
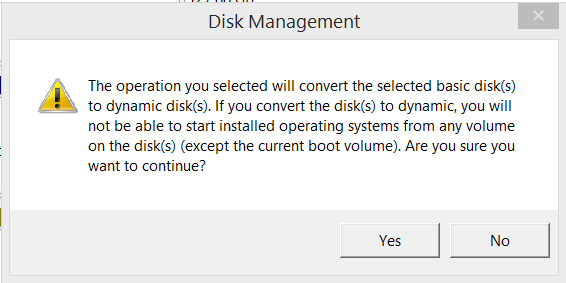 At the end there is one very important warning, and that is the disks are going to be converted to Dynamic, which will destroy all your multi-boot options that you might have available.
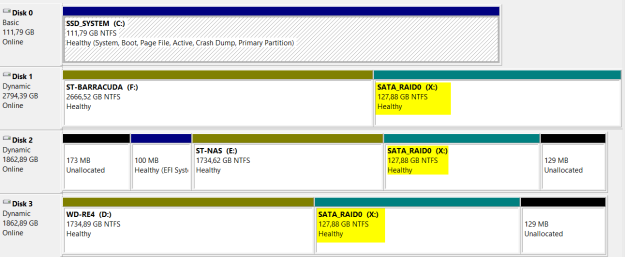 Eventually, this is he view of our new software RAID0.
We’ve got our Networking and local storage set up – the first two cornerstones for our upcoming ESXi build & Starwind Virtual SAN initialization. These will be coming very soon.
Thank you for the attention and I hope some of you will be inspired to start a lab of their own. Cheers!
